Free Amigurumi Pattern
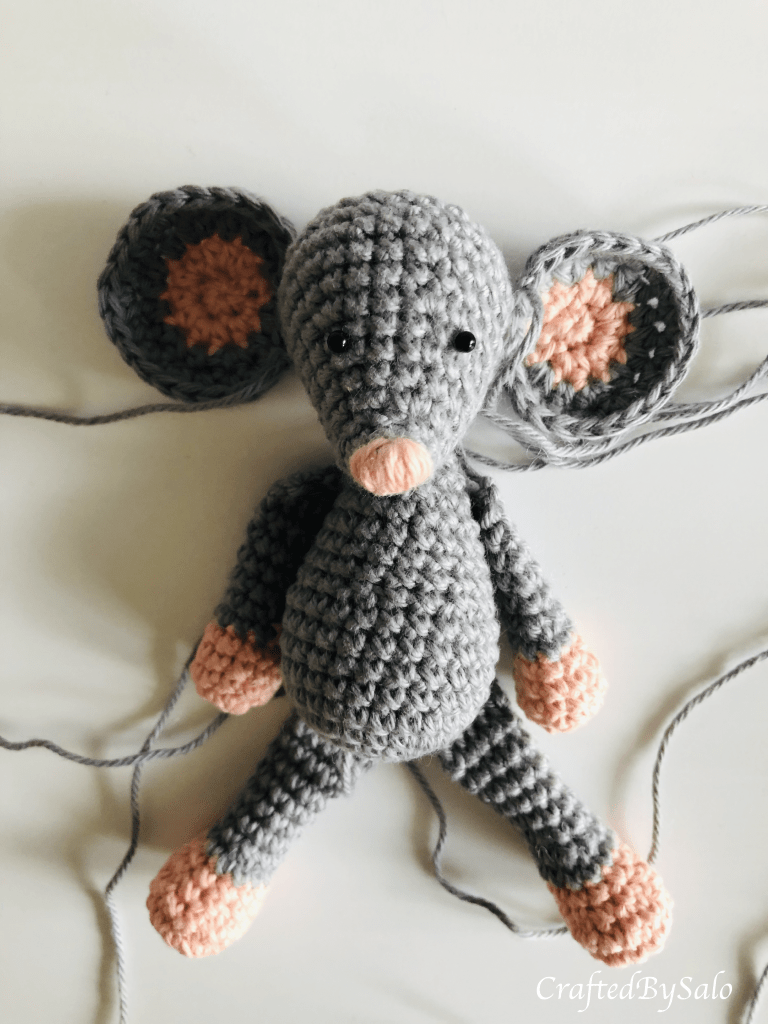
Little mouse Missie is one of the first amigurumi toys I’ve designed. Missie is a very curious and lovely little mouse. I believe she will make a lot of friends worldwide.
Downloadable PDF pattern in Swedish is available here.
Thank you to Kattis Bäckström for the translation.
I would love to see the toys that you make using this pattern, please share the pictures with me on Facebook or Instagram @craftedbysalo

Supplies needed
- Cotton yarn in grey and pink colors. I used Anna & Clara’s, 8/4, OEKO-TEX quality cotton
- 3 mm crochet hook (if you choose different yarn use the hook size stated on the yarn
- Fiberfill
- Black yarn for the eyes
Skill Level
- Easy
Abbreviations
- st =stitch
- sc = single crochet
- hdc = half double crochet
- inc = increase (2 sc in one st)
- dec = decrease (2 sc together)
- […] = total number of stitches (numbers in the squred brackets after each round)
- (…) = repeat the instructions in the brackets
Head

R1 6 sc in magic ring [6]
R2 sc in all 6 st [6]
R3 (sc in 1 st, inc) repeat 3 times [9]
R4 sc in all 9 st [9]
R5 (inc) repeat 5 times, sc in the next 4 st [14]
R6 sc in all 14 st [14]
R7 (sc in 1 st, inc) repeat 5 times, sc in the next 4 st [19]
R8 sc in all 19 st [19]
R9 (sc in 2 st, inc), sc in the next 4 st [24]
R10 sc in all 24 st [24]
R11 (sc in 3 st, inc) repeat 6 times [30]
R12 sc in all 30 st [30]
R13 (sc in 3 st, dec) repeat 6 times [24]
R14 (sc in 2 st, dec) repeat 6 times [18]
R15 (sc in 1 st, dec) repeat 6 times [12]. Stuff the head with fiberfill.
R16 (dec) repeat 6 times [6]. Cut the yarn and leave the long tail for sewing. Close the hole by sewing only front loops of the stitches together.
When you are finished with the head use the pink yarn to embroider the nose.
Ears (make two)

Start with the pink yarn
R1 6 sc in magic ring [6]
R2 2 hdc in all 6 st [12]
Slip stitch, chain one with the grey yarn
R3 (1 hdc in 1 st, 2 hdc in the next st) repeat 6 times [18], finish with a slip stitch.
R4 (1 hdc in 2st, 2 hdc in the next st ) repeat 5 times [23]
Finish with a slip stitch and leave the long yarn tail for sewing.
Body

R1 6 sc in magic ring [6]
R2 (inc) repeat 6 times [12]
R3 (sc in 1 st, inc) repeat 6 times [18]
R4 (sc in 2 st, inc) repeat 6 times [24]
R5-R9 sc in all 24 st [24]
R10 (sc in 2 st, dec) repeat 6 times [18]
R11-R14 sc in all 18 st [18]
Stuff the body and continue stuffing as you proceed further.
R15 (sc in 1 st, dec) repeat 6 times [12]
R16 sc in all 12 st [12]
R17 (sc in 2 st, dec) repeat 3 times [9]
Finish with a slip stitch and leave the long yarn tail for sewing.
Arms (make two)

Start with the pink yarn.
R1 6 sc in magic ring [6]
R2 (inc) repeat 6 times [12]
R3 sc in all 12 st [12]
R4 (sc in 4 st, dec) repeat 2 times [10]
R5 sc in all 10 st [10]
Change to the grey yarn. Stuff the arm with a fiberfill. You do not need to stuff the rest of the arm as you continue.
R6 sc in all 10 st [10]
R7 (sc in 3 st, dec) repeat 2 times [8]
R8-R11 sc in all 8 st (8)
To finish the arms ch1, turn the arm, sc 3 st through both sides of the arm. Leave the long yarn tail for sewing.
Legs (make two)

Start with the pink yarn.
R1 6 sc in magic ring [6]
R2 (inc) repeat 6 times [12]
R3 (sc in 1 st, inc) repeat 6 times [18]
R4 sc in 5 st, dec, sc in 1 st, dec, sc in 1 st, dec, sc in 5 st [15]
R5 sc in 3 st, dec, sc in 1 st, dec, sc in 1 st, dec, sc in 4 st [12]
R6 sc in all 12 st [12]
Change to the grey yarn and stuff the leg with fiberfill. You do not need to further stuff the legs with the fiberfill as you continue.
R7 sc in all 12 st [12]
R8 (sc in 4 st, dec) repeat 2 times [10]
R9-R14 sc in all 10 st [10]
To finish the legs ch1, turn the leg, sc 4 st through both sides of the leg. Leave the long yarn tail for sewing.
Assembly and the tail
This part is just a guide. You can add your touches and improvise. Play around a little bit and see what looks good.
- You can use black pins to determine the position of the eyes. After you find the right position use the black yarn to embroider them. I embroidered eyes between rounds 6 and 7 with 4 stitches apart.
- Sew the ears between rounds 12 and 13 of the head with 8 stitches apart.
- Sew the arms to the body between rounds 14 and 15.
- Sew the legs on the bottom of the body. Choose the position so Missie can sit.
- To finish, choose two of the long yarn tails that are left from sewing different parts together. Find a good position for the tail and chain 10-15 stitches. Tie the yarn endings and cut the leftover yarn. I chose between rounds 6 and 7 to add the tail.
- Note: When sitted Missie is about 8-9 cm tall.
Even though the pattern is the same for many of you, Missies will look different. That is the charm of the handmade amigurumi toys. Each individual will have their very own special look. I would love to see these looks, so please post the pictures of your finished toys on my Facebook or Instagram page. I hope you will enjoy making Missie!
Copyright:
This is an original design of CraftedBySalo, therefore please give the credit to CraftedBySalo when using the pattern. You may crochet the toy for personal use, or you may sell limited numbers of finished copies. You may share the link, but you may not copy and sell the pattern.
